How to Publish a Blog containing a Vimeo Video

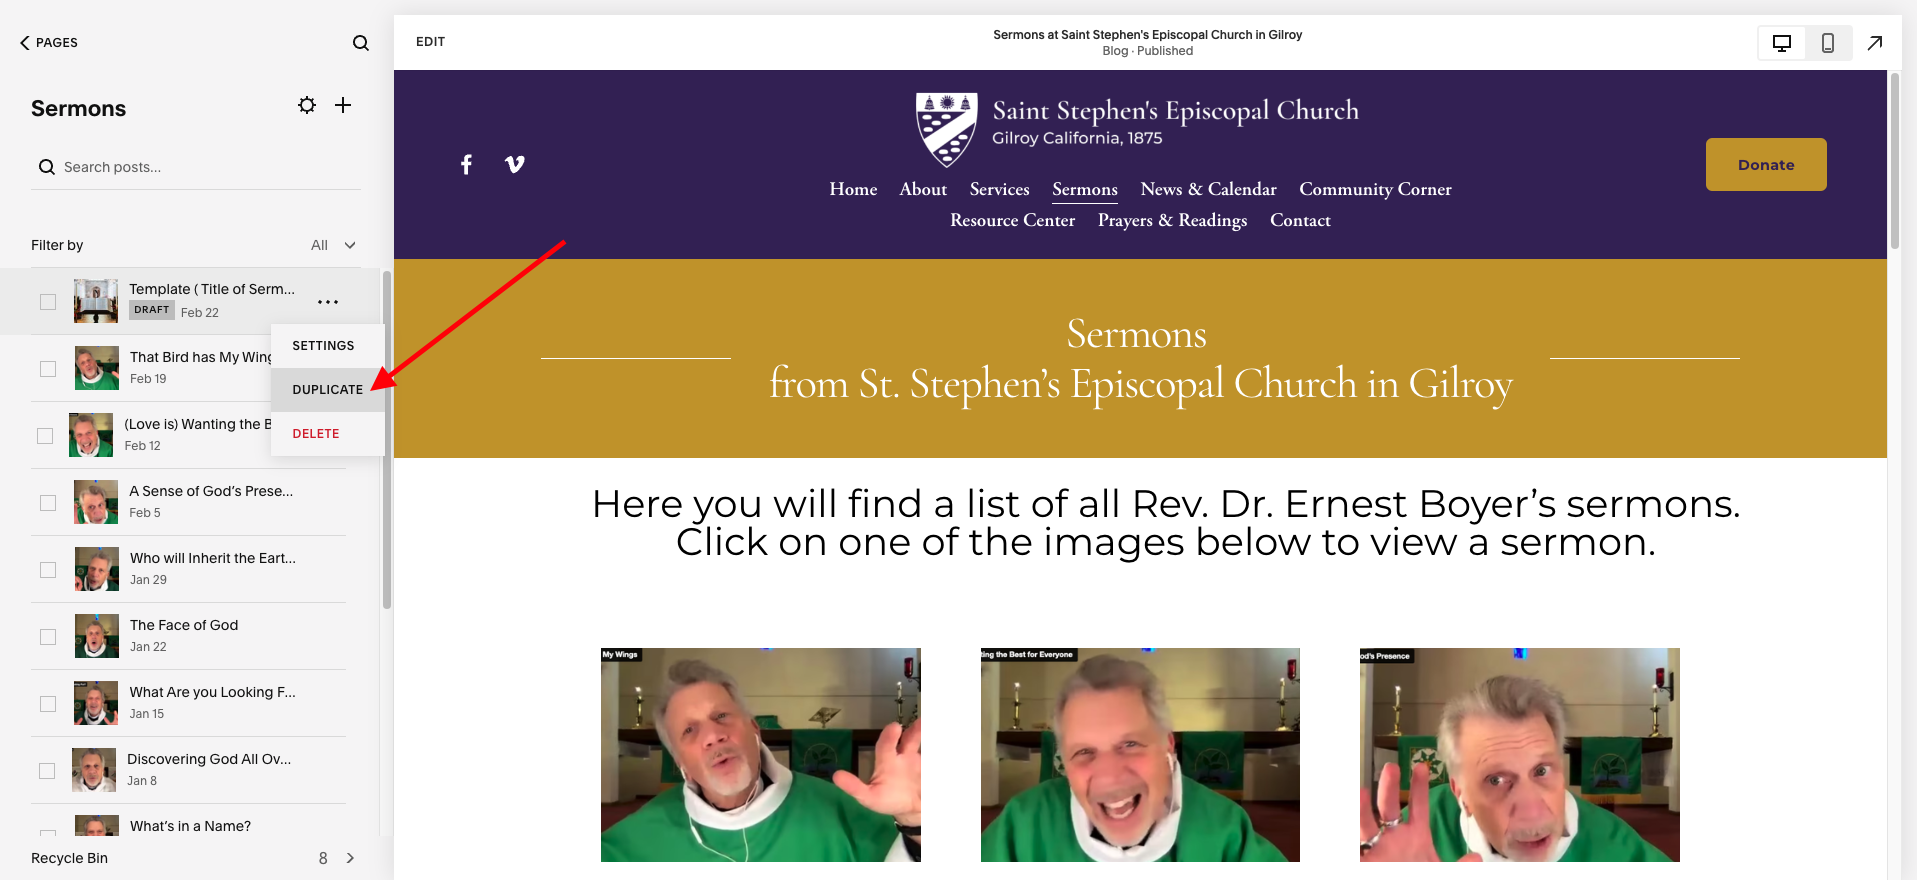


Go to ‘PAGES’ and click on the ‘SERMONS’ blog where you have your vimeo video containing blogs.
Go to the ‘TEMPLATE DRAFT’ and click on the ‘…’ button.
Choose the ‘DUPLICATE’ option in the drop-down menu.
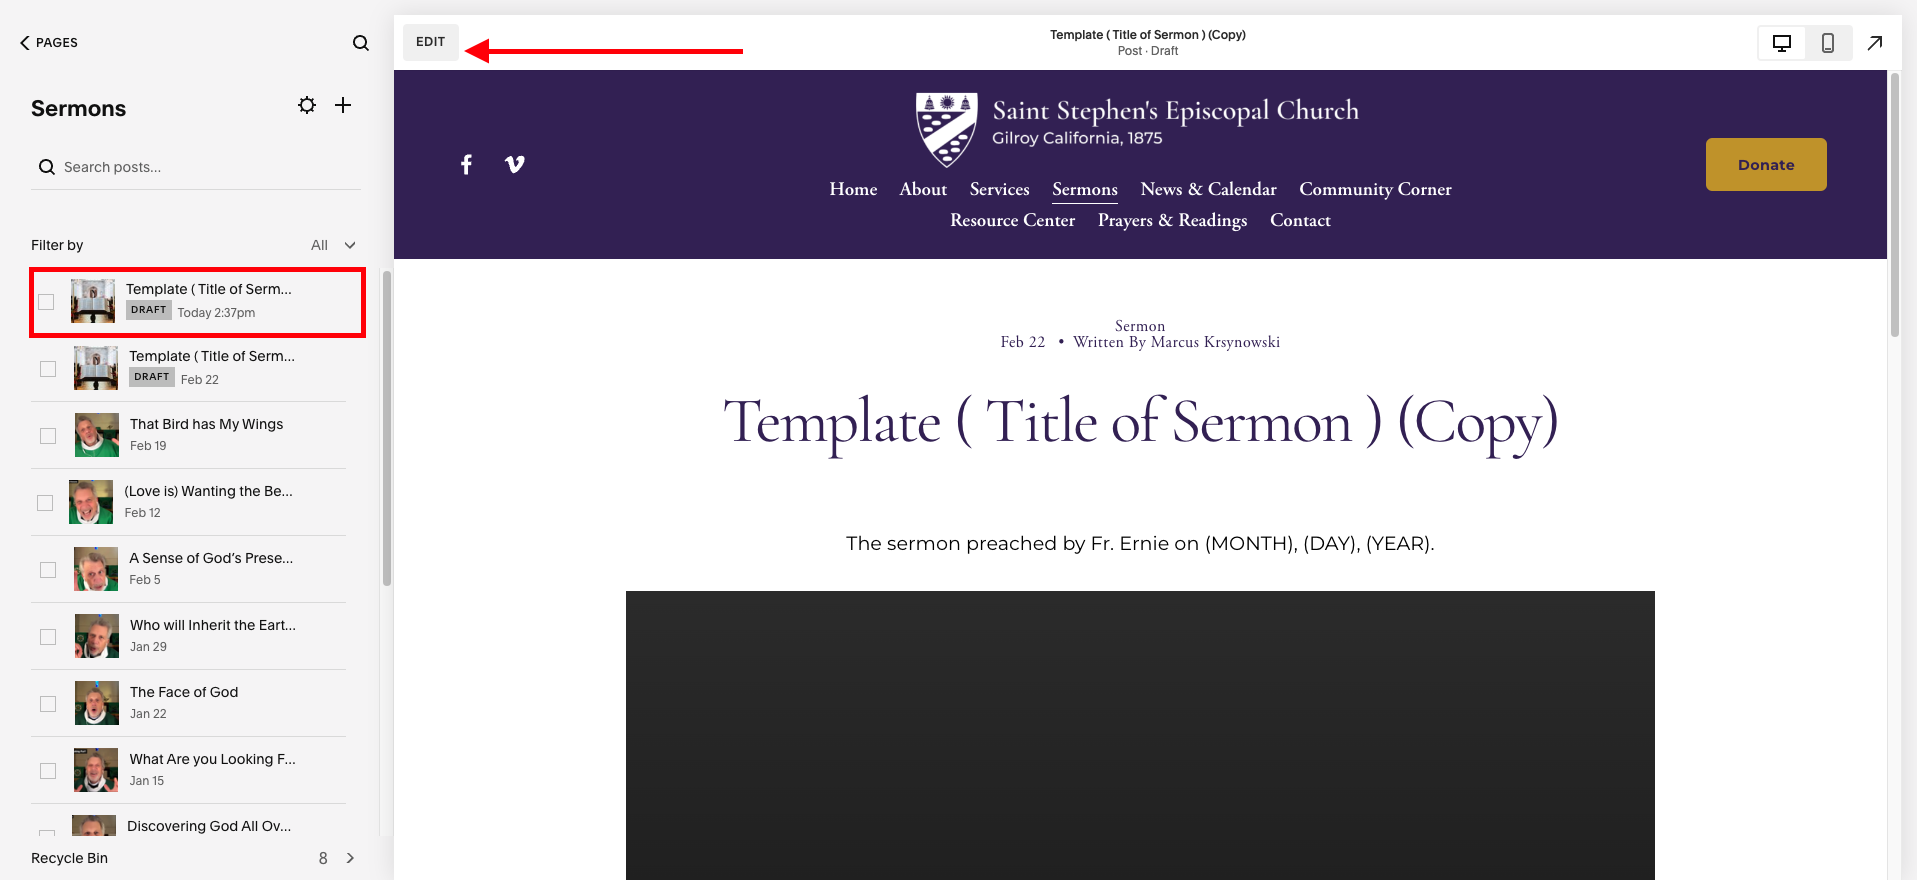
A DRAFT copy of the blog will show up at the top. The title will have ‘(COPY)’ in it and the new entry will also be automatically set as a ‘DRAFT’.
Click the ‘EDIT’ button in the top left corner of the blog page to open up the post for editing.
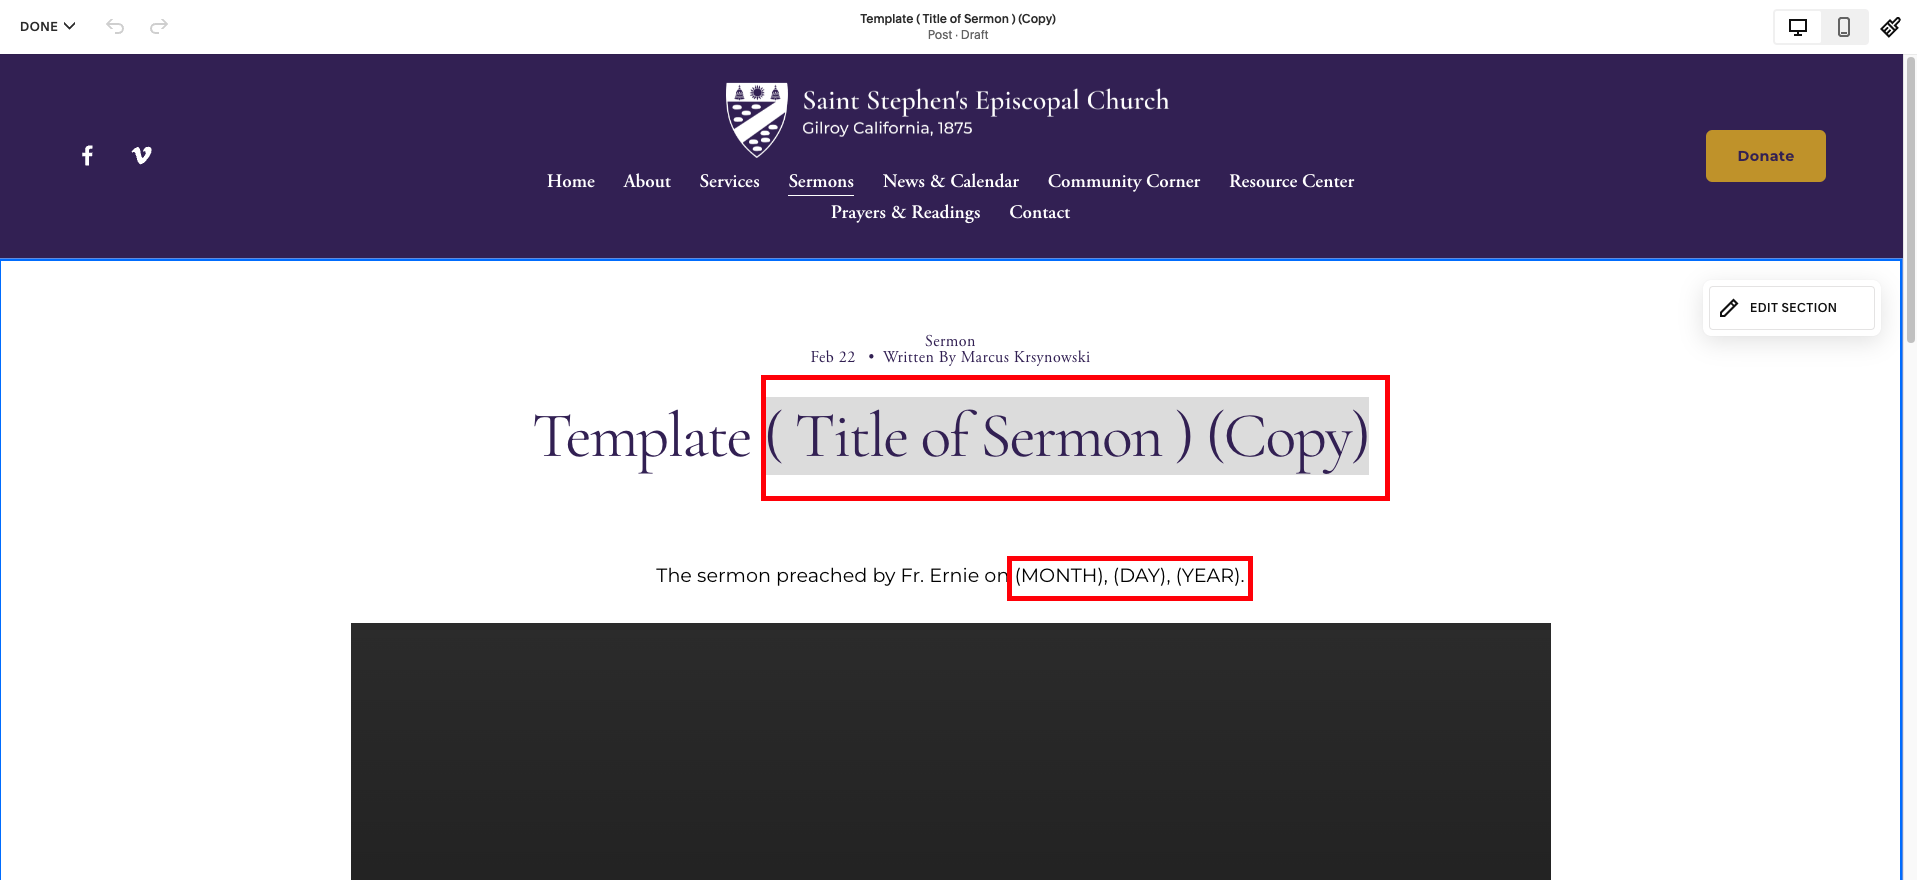
Update the title name of the new post.
Change out any dates or text that needs to be updated by using the copy and paste tools.
Click on the video block in the blog.
Once you see the ‘PEN’ icon show up, click on it to open up the video edit section.
In a separate window, open up your vimeo account.
Click on the video that you would like to upload.
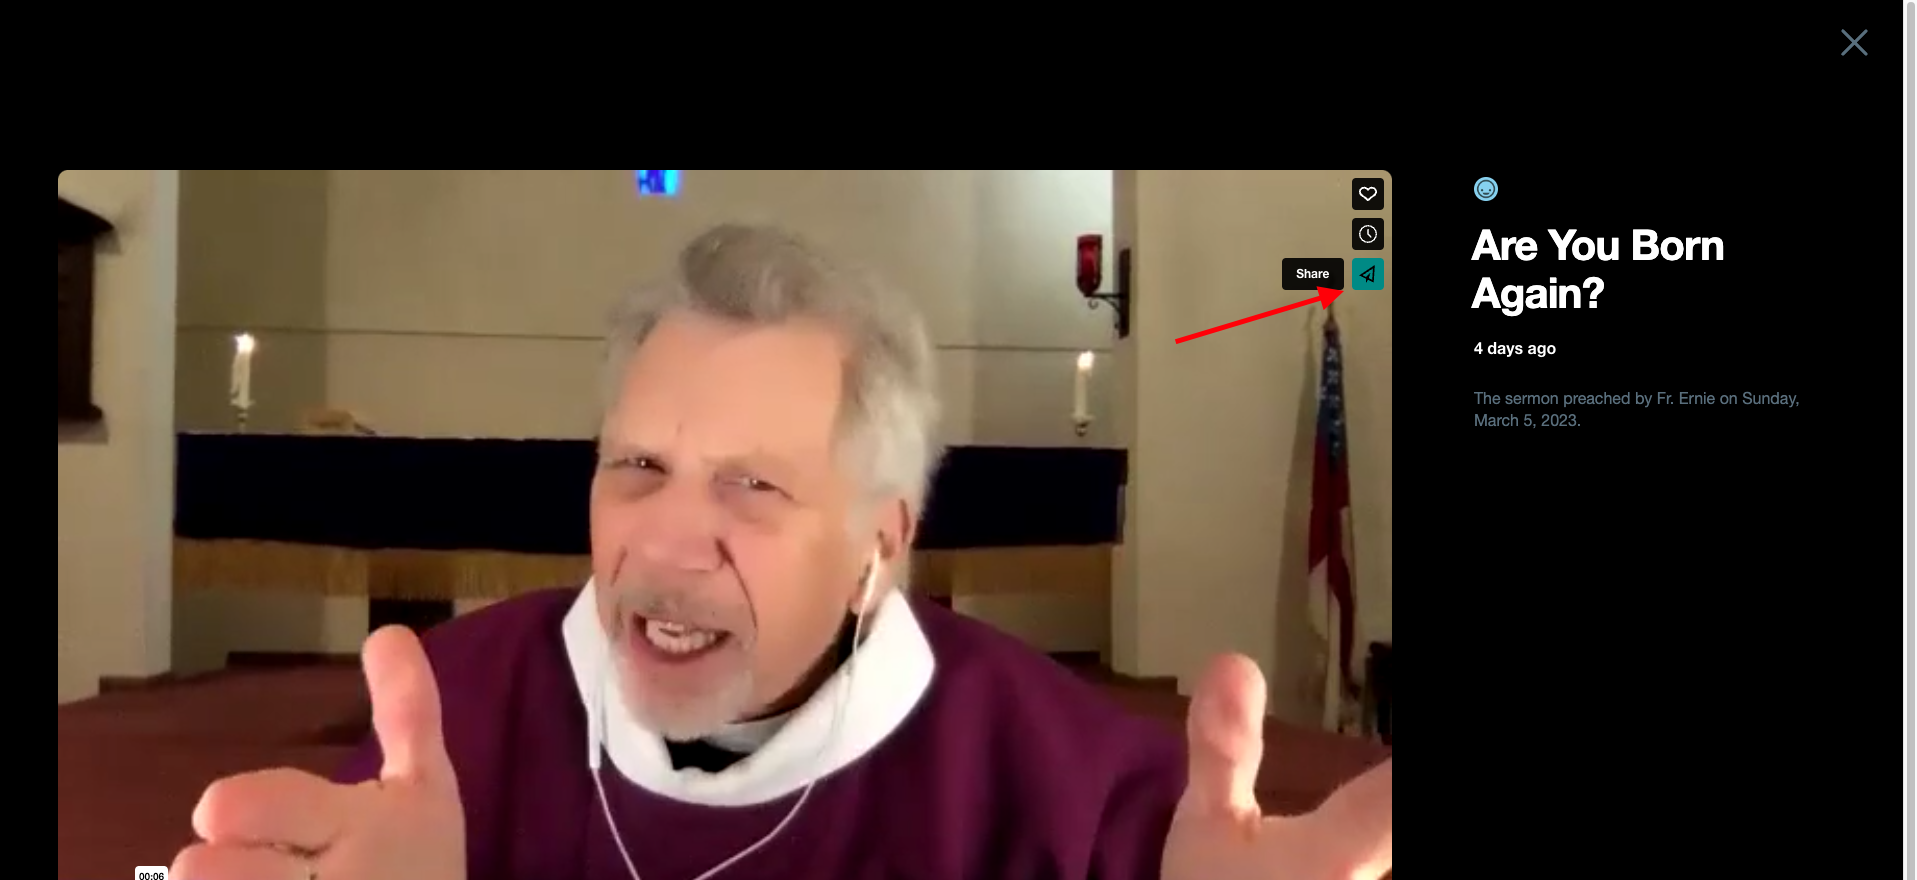
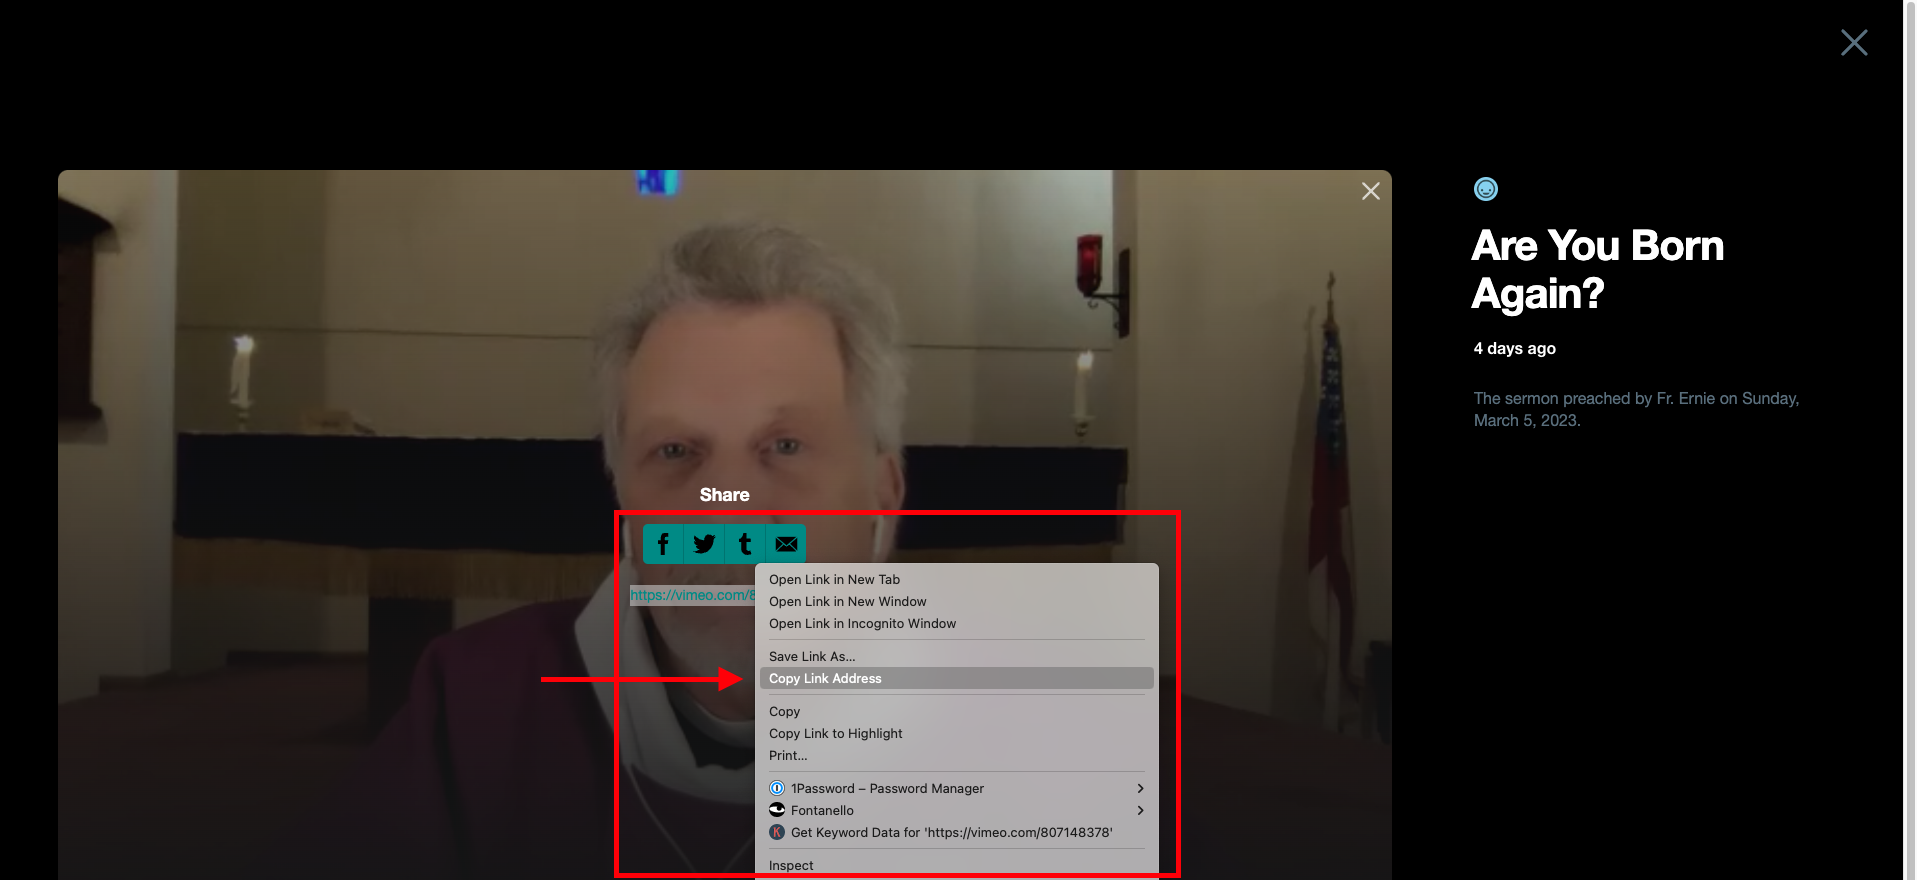
Click on the paper airplane icon in the top right of the video screen on vimeo.
Press either the ‘COPY’ or ‘COPY LINK ADDRESS’ options in the drop down menu.
Go back to the Squarespace window tab.
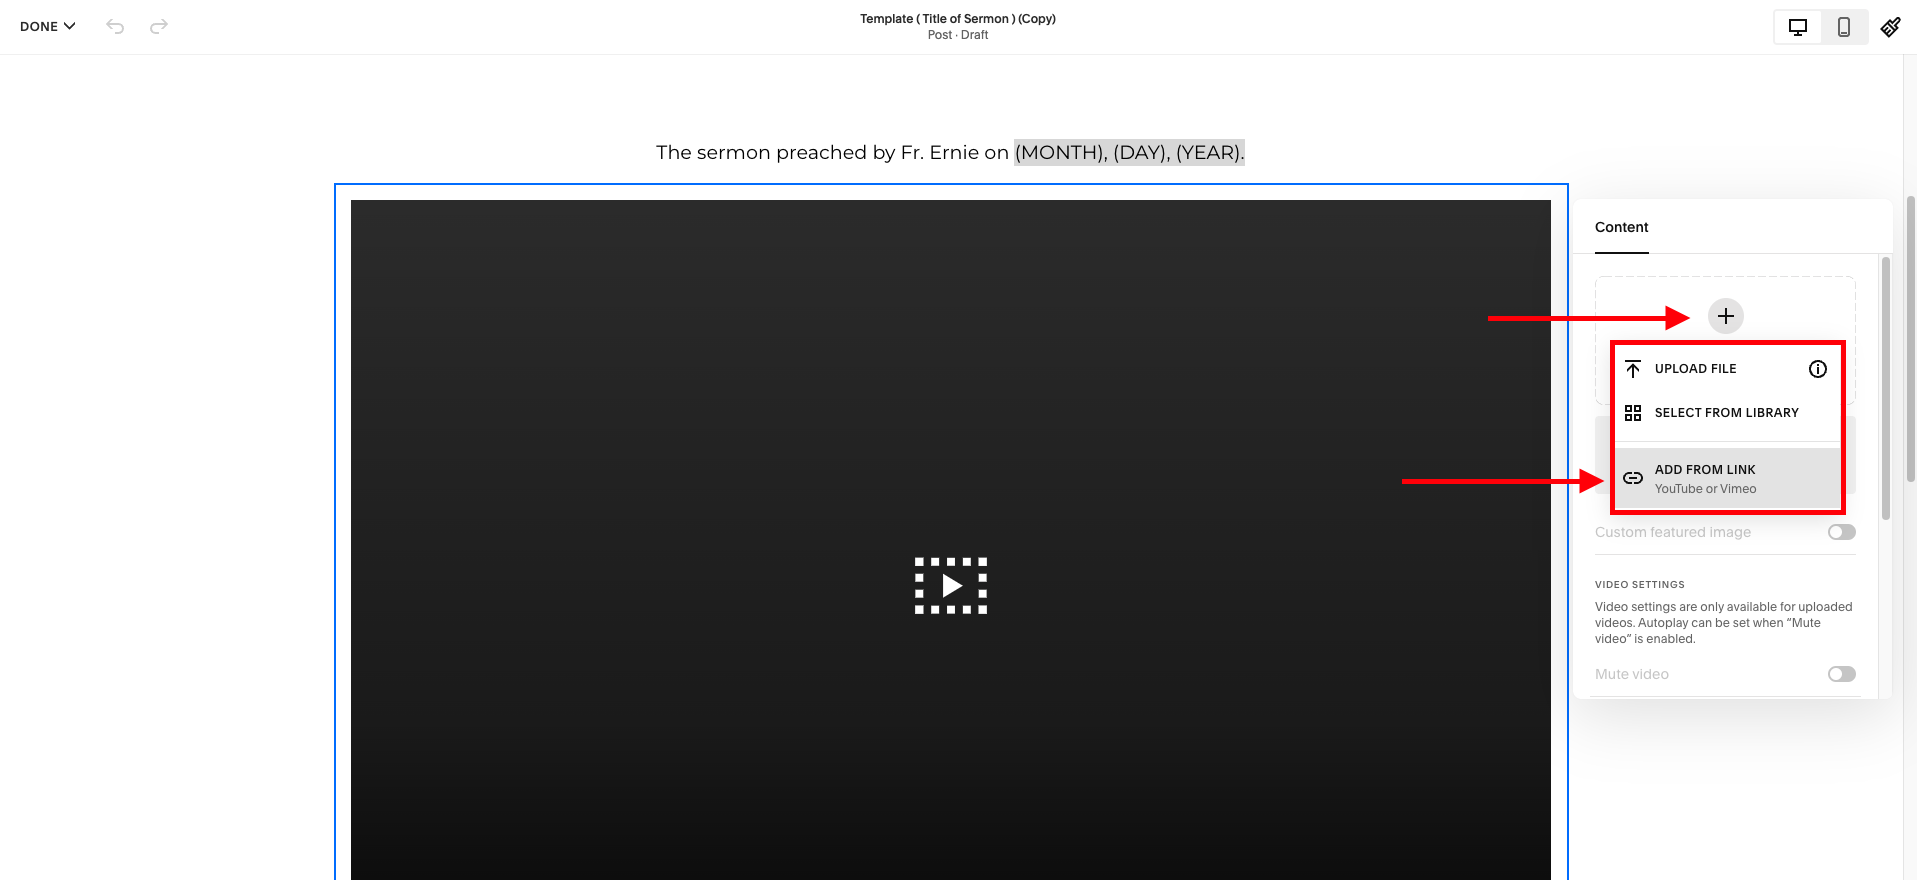
To change out the vimeo video, click on the ‘+’ button over ‘ADD VIDEO’ and then click on the ‘ADD FROM LINK’ option in the drop down that comes up.
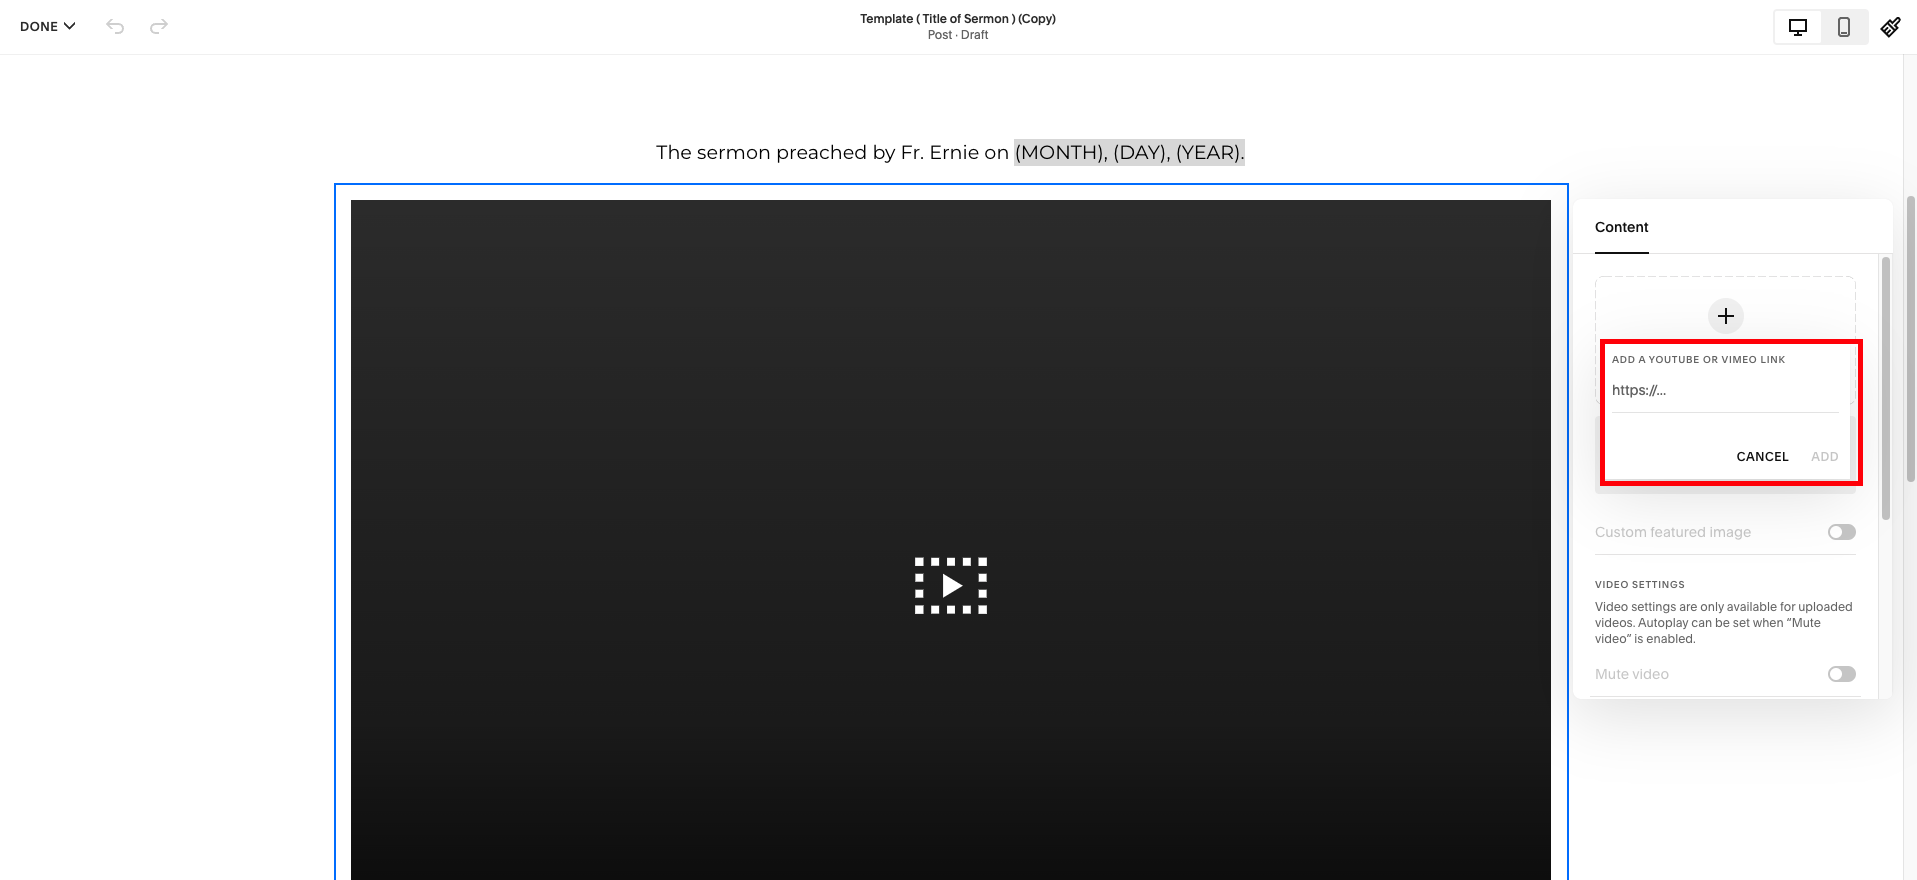
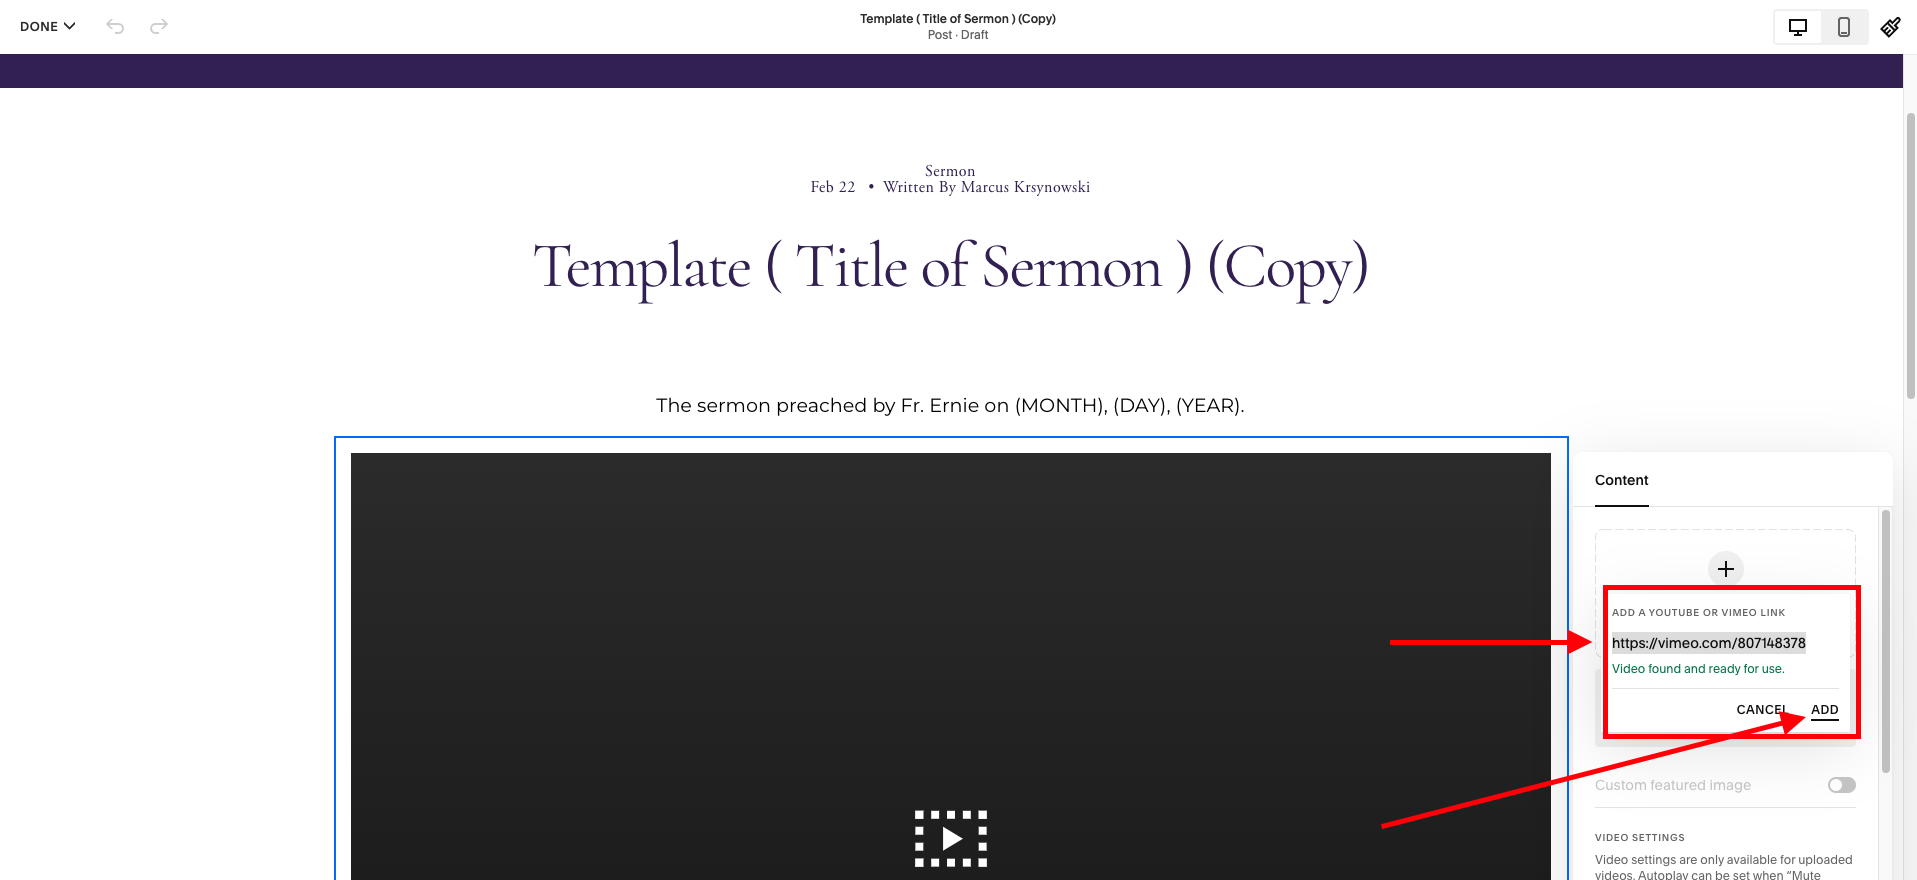
Paste in the copied link from Vimeo
Once you have pasted it in, click on the ‘ADD’ button in the lower right section of the window in which you are working.
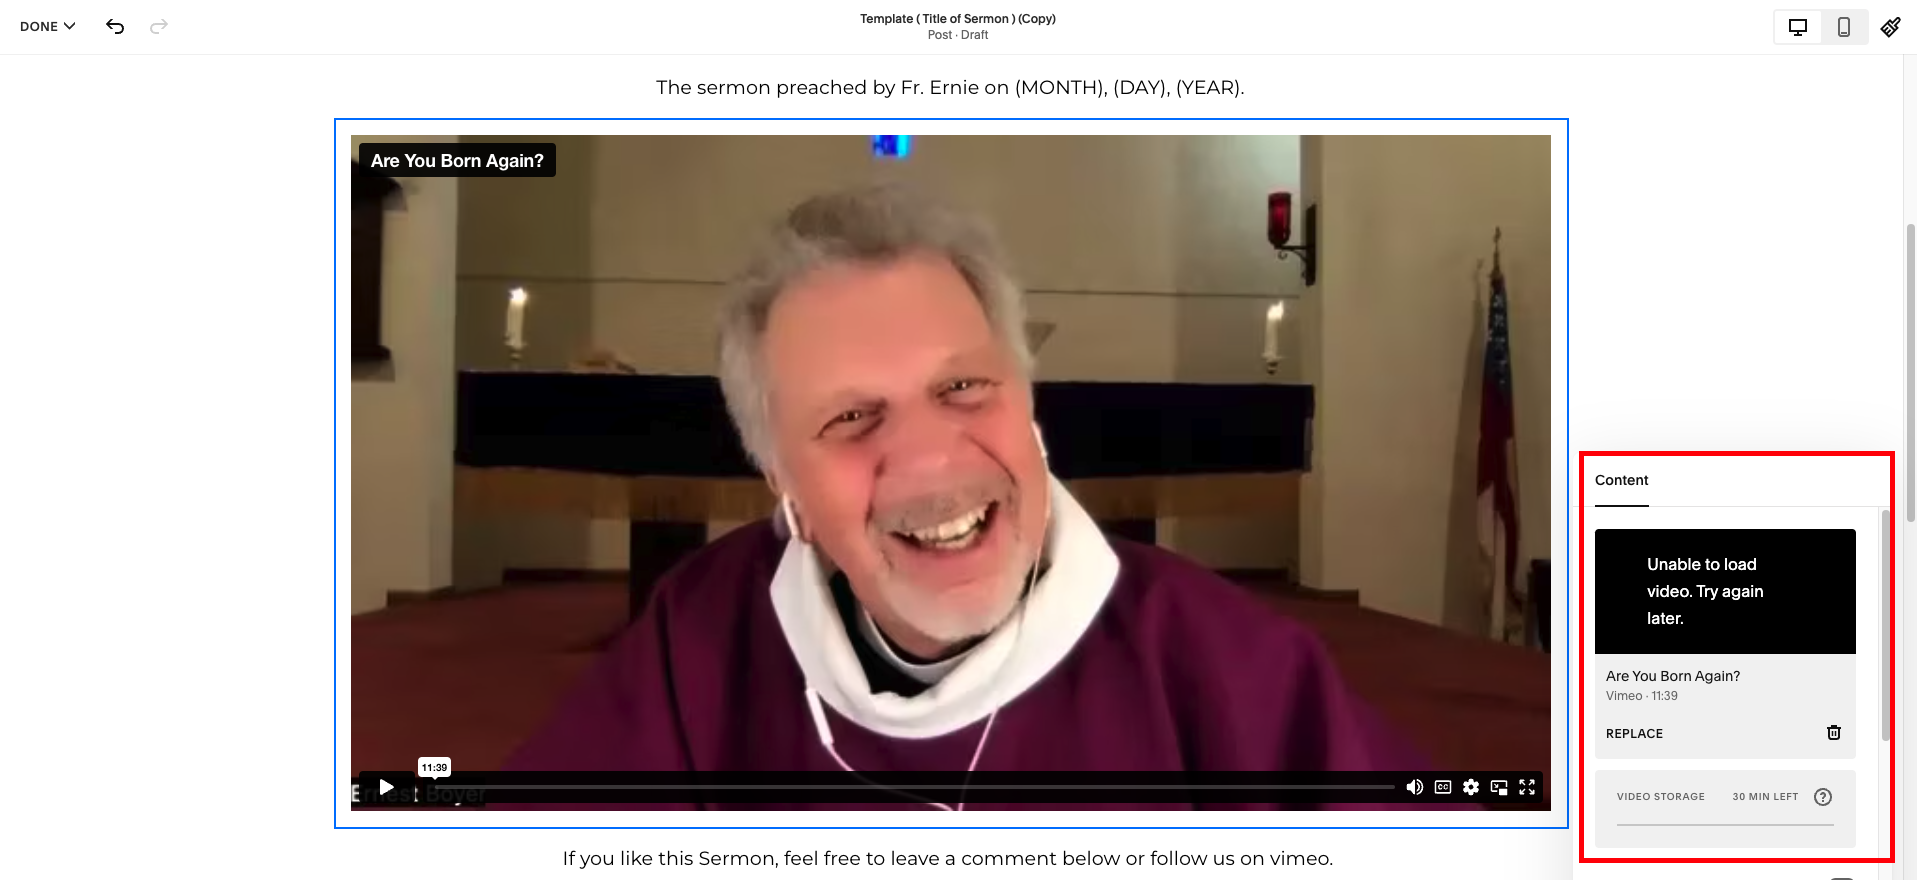
The video will populate the space and be ready to play.
(Ignore the ‘unable to load video. Try again later.’ statement as this is a strange glitch that is untrue - as long as you see the video on your blog post screen, all is good)
Click outside of the window to close the video edit window.
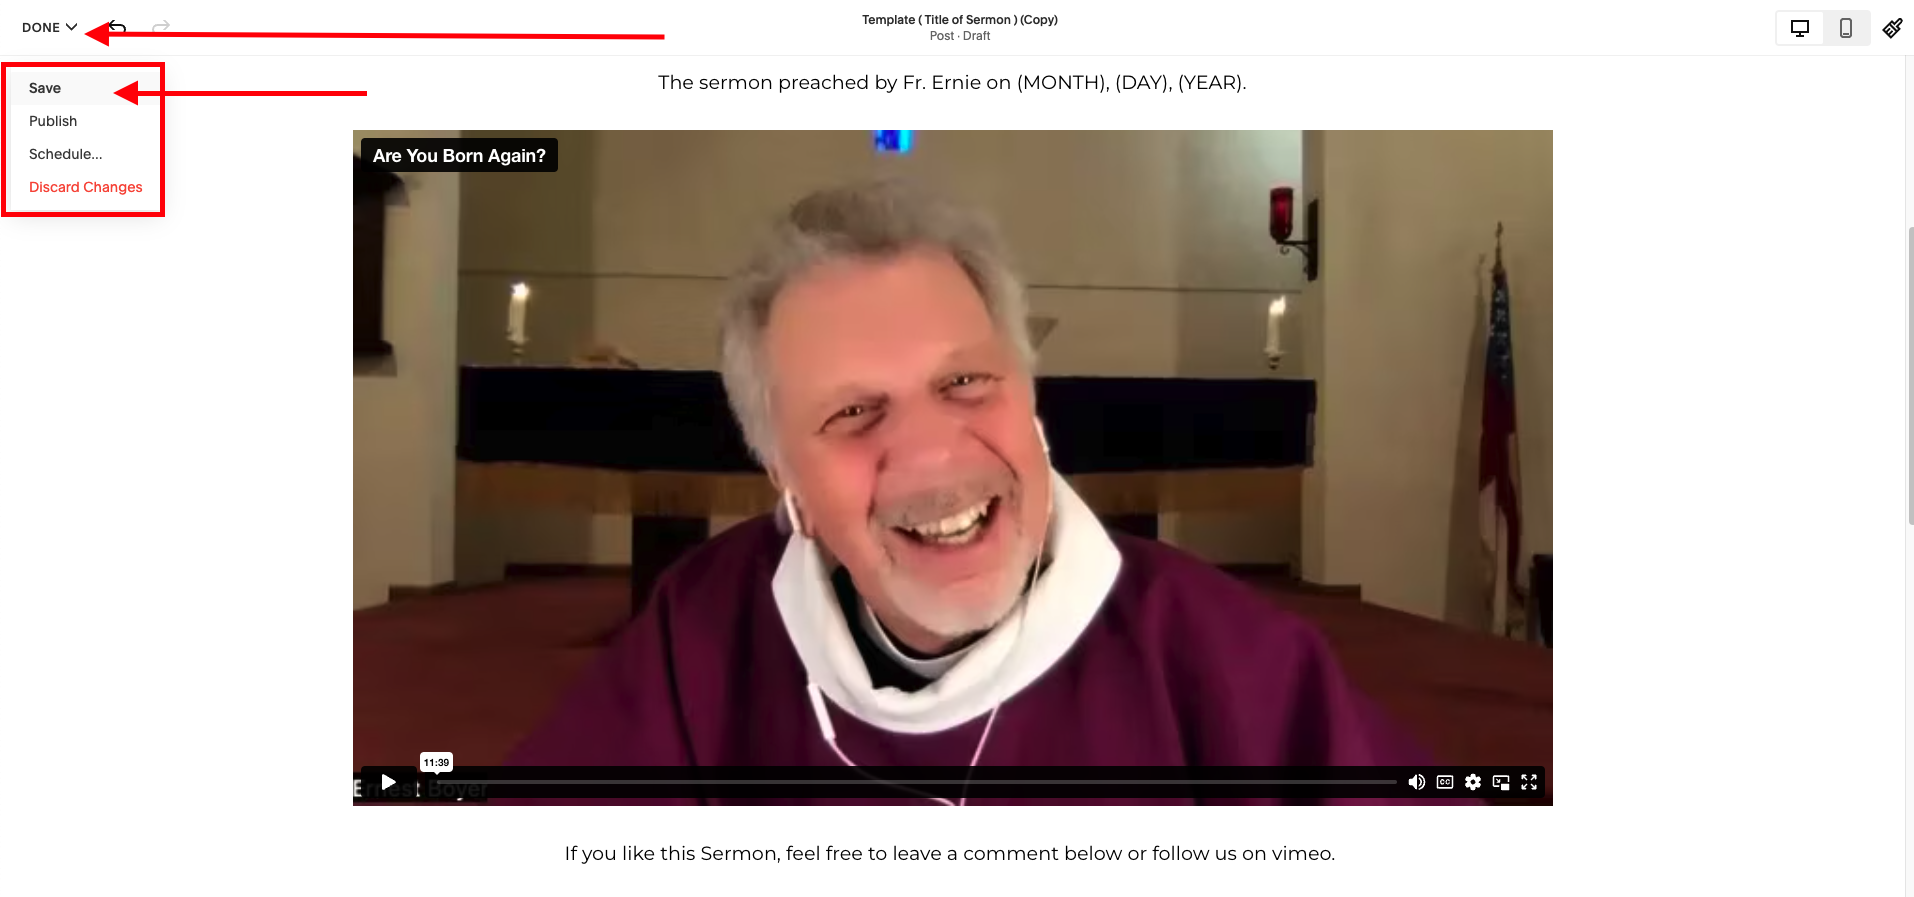
Hover over the ‘DONE’ button in the upper left corner of your screen and click on the ‘SAVE’ option.
(remember to consistently ‘SAVE’ your work as you go)
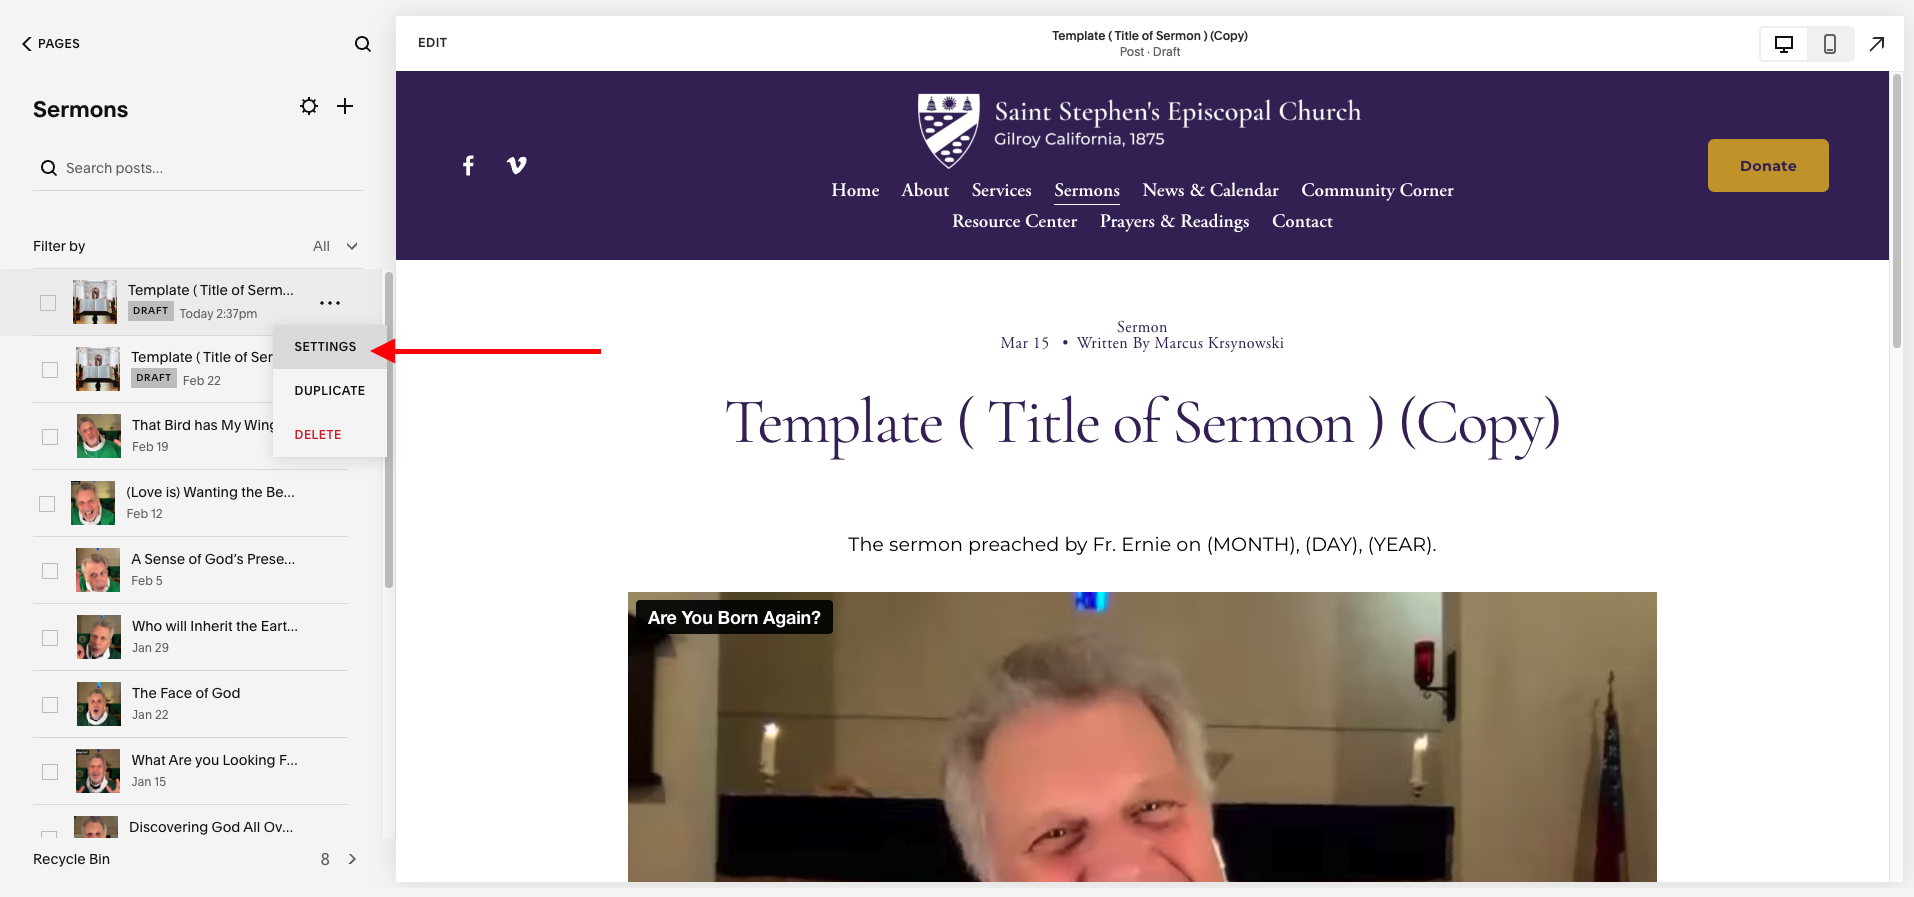
In the navigation menu, click on the ‘…’ button next to the draft of the blog you are currently working on. Then press the ‘SETTINGS’ option in the drop down menu.
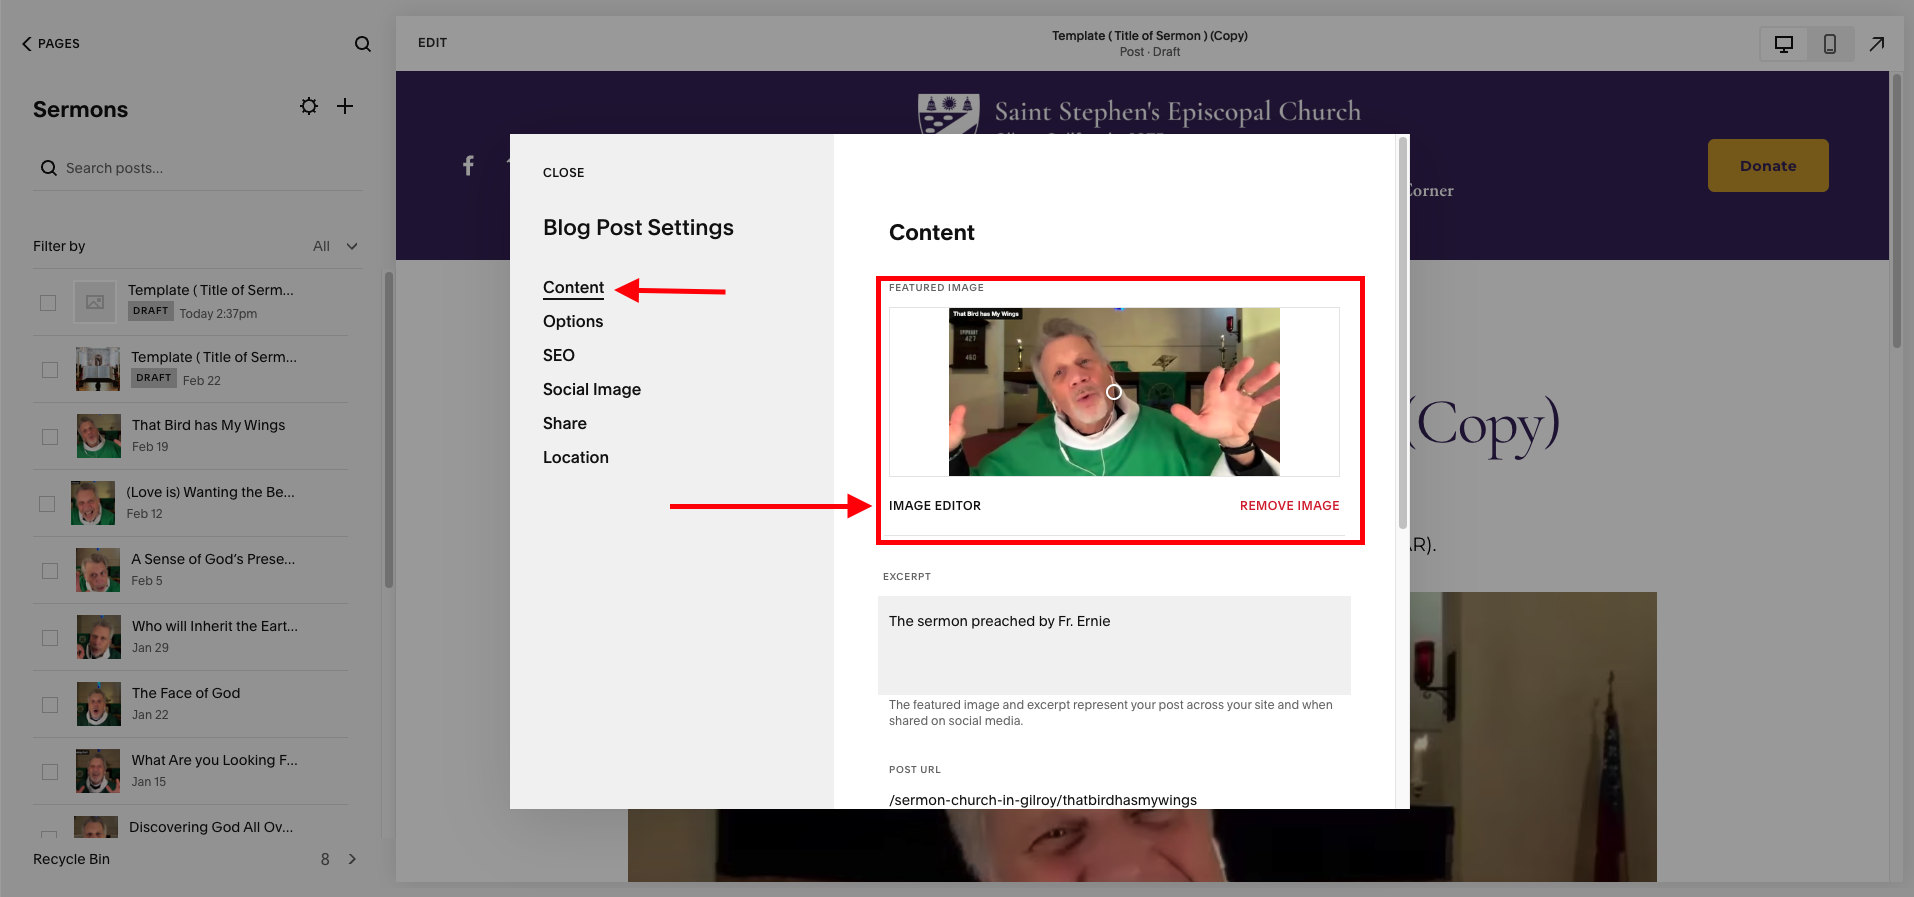
Click on the ‘CONTENT’ section of the BLOG POST SETTINGS window (unless it is already open).
Remove the image and add in the thumbnail of your choice.
If you want to use a photo from your computer, click on ‘+ ADD IMAGE’ and choose the photo from your computer that you wish to upload.
If you want to use a photo that you have already uploaded to the website, click on the ‘SEARCH FOR IMAGES’ link. Then go to the ‘MY LIBRARY’ and choose a photo.
If you want to choose a photo from the free images library from unsplash, click on the ‘SEARCH FROM IMAGES’ link. Then go to the ‘FREE IMAGES’ tab, search a topic, and choose your photo to upload.
Write in an excerpt if you so choose using one or two lines from your post. (no title necessary)
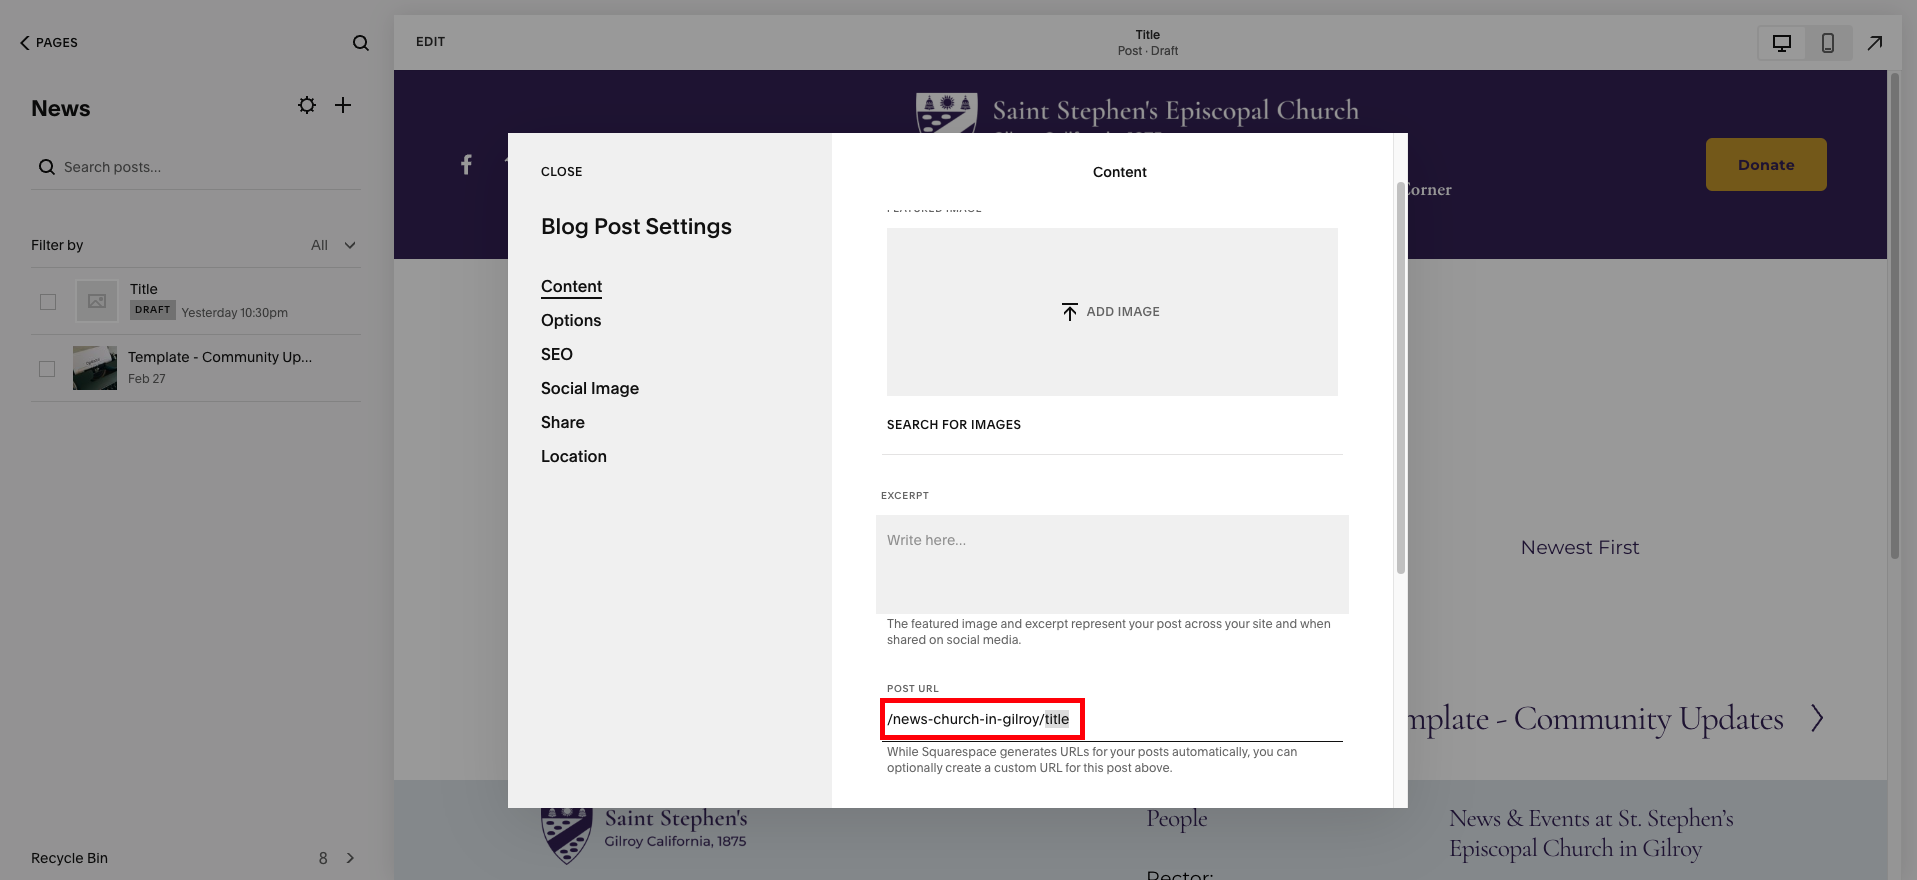
Do not forget to type in the title of the blog post as the ending of the ‘POST URL’ (no special characters or uppercase is possible here)
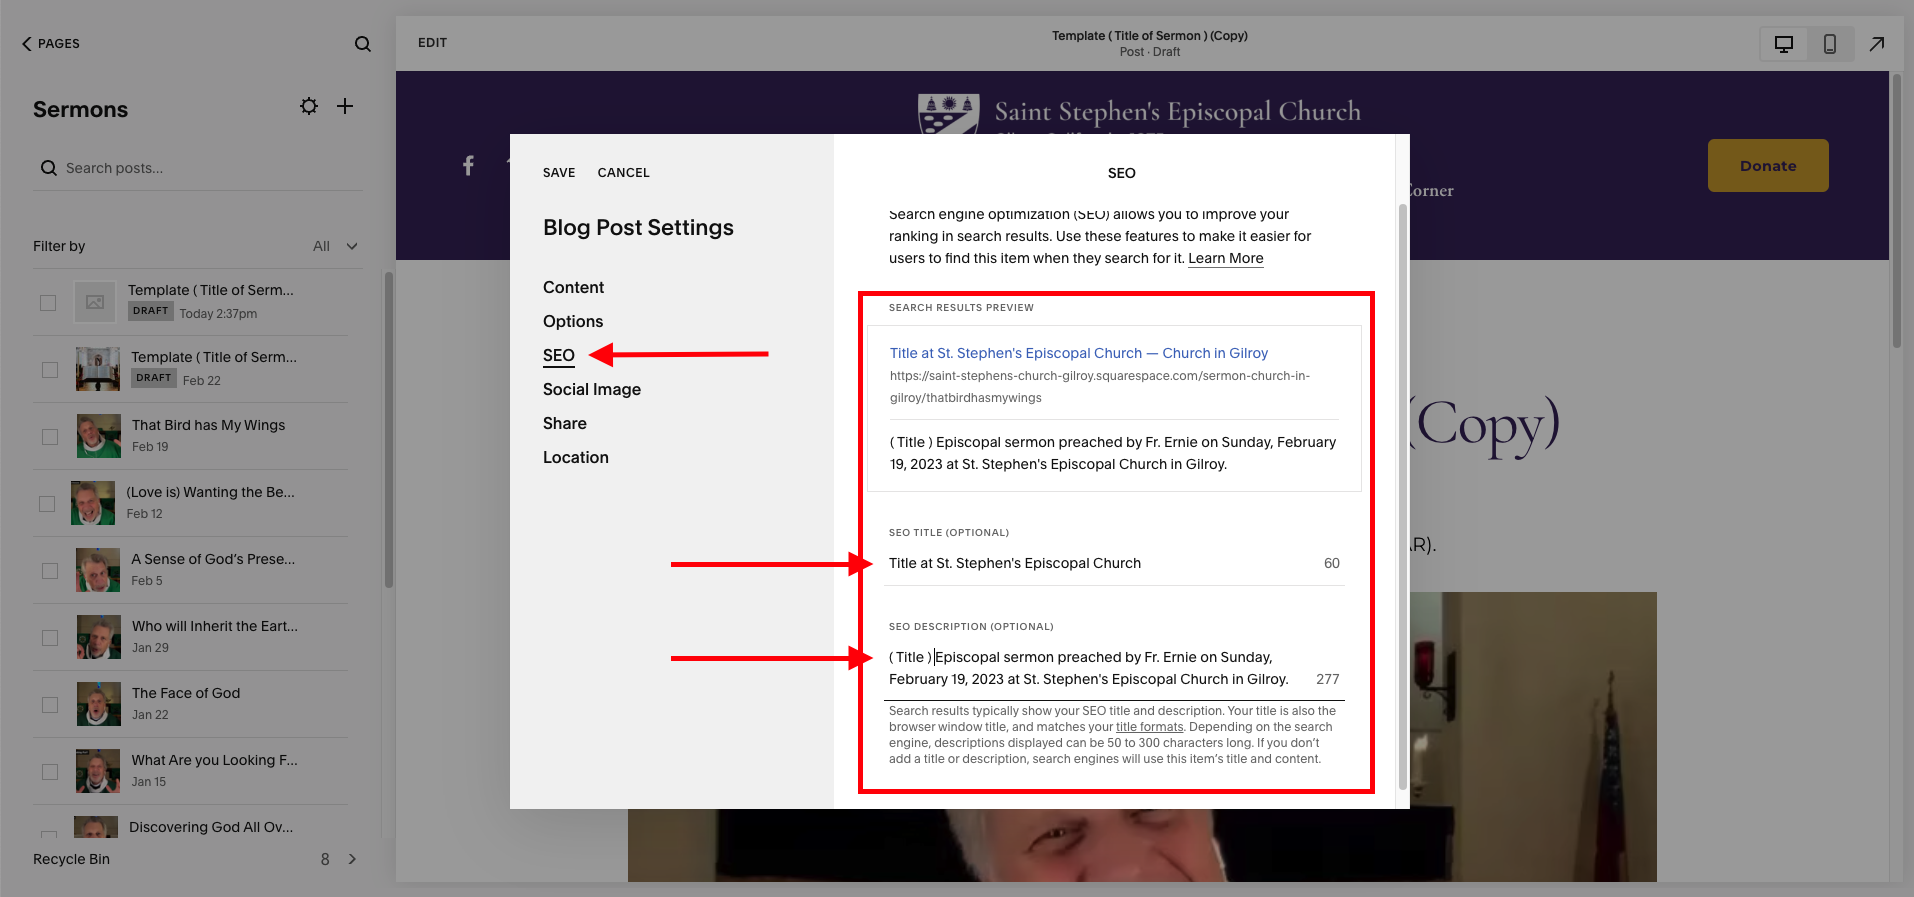
SEO section: SEO stands for Search Engine Optimization and refers to descriptions and language on your website that Google reads and ranks on its search engine.
It is good to type in a SEO title and SEO description using keywords that will match what a potential viewer would search. This SEO title and description will be previewed in the box at the top. The preview is what a potential viewer will see and be able to read before clicking.
Options Section:
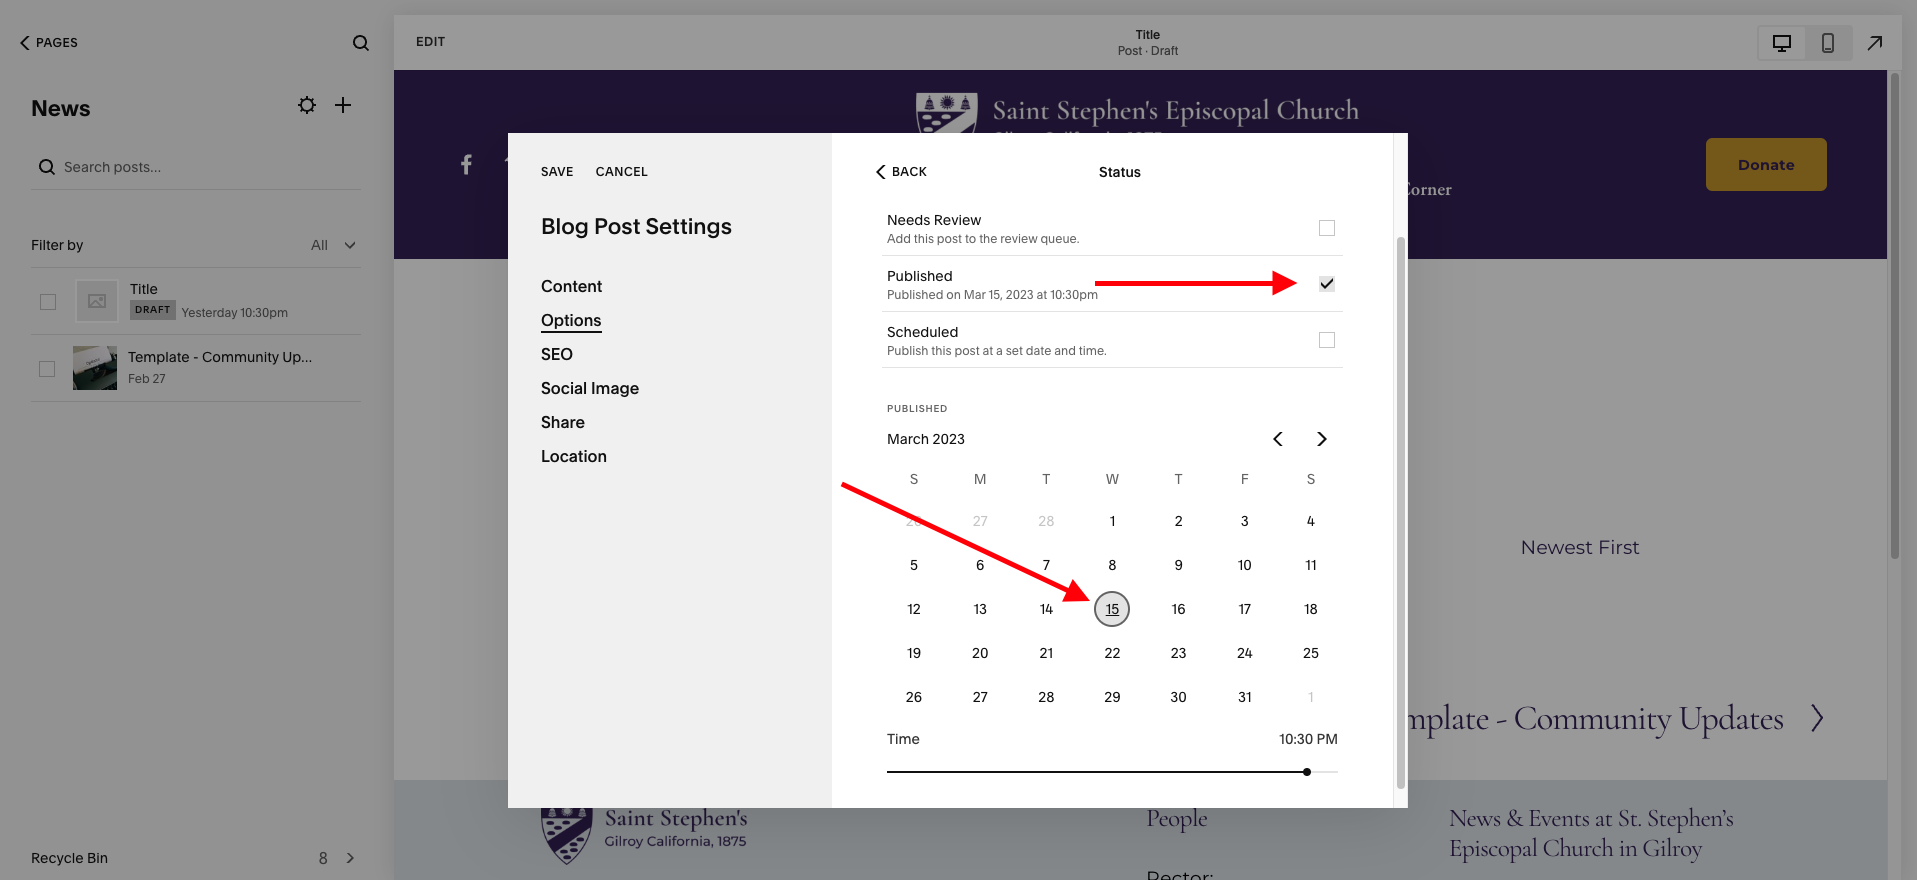
Go to ‘STATUS’ and click on the arrow to the right. You will be taken to a variety of options including Draft, Needs Review, Published, and Scheduled.
When you are ready to publish your blog, click on the ‘PUBLISHED’ check box.
A calendar will pop up and you want to make sure that it is published on the correct date. If that is today’s date then leave it at today’s date.
If it needs to be recorded as published on a date in the past, then simply find and choose the correct date from the past.
If you want to publish this post on a date in the future, then press the ‘SCHEDULED’ check box and choose the date and time you wish to set up for publishing.
Once you set the status of your blog post to ‘PUBLISHED’ or ‘SCHEDULED’, click on ‘SAVE’ in the upper left corner and you have completed your post!